Ok, so as promised here I am with the second part of the Art journal adventure 😊
present day!!!
So I was inspired once more watching Abs demo the new releases of Aall & Create stamps and snook a quick purchase of a new ad older set in from Bubblyfunk ( there are a few sets on sale there so go and have a look!!!)
The new sets are amazing!!! I would love them all... Abs and team you are seriously a danger to my bank account!!!
I also bought myself a Versafine Clair black inkpad.... I am so happy with how it stamps... downside is its not permanent ink so anybody got any recommendations? I have fallen out with my Ranger Archival one!!
I decided to add some texture to the pages using Thats Crafty gel medium through my collection of Bubbly Funk stencils last week.
Some were just traditionally stencilled through applied with a palette knife, some were the sticky stencil pressed on the pages and others were the remains pushed through then stencils with my finger. Each technique gives a totally different result.
When dry I sprayed some with my Tim Holtz Picket Fence distress spray to highlight the textures created.
i didn’t really mean to publish that then, but never mind!!! I’ll leave it there for now..... ScrappyDandyDoo will return soon ( not quite as quickly hopefully this time lol ) Hugs’n’snogs, J xx
Ok, so i’m having a few tech issues with my phone and blogger so I think I will split this super long post over a couple of days to make it easier and so you don’t fall asleep half way through!!!
So Caroline sent me this awesome kit wayyyyyy back in January and I loved it!!!
I’m mot really a journal person and have never managed to keep a diary longer than a week in my whole life lol.
I was so inspired just by the colours on that first file folder with the days of the week and had this grand master plan to keep the whole thing really simple and clean looking with painted acrylic pages embellished with the lovely bits of teresa collins papers and a few Aall & Create stamped images...
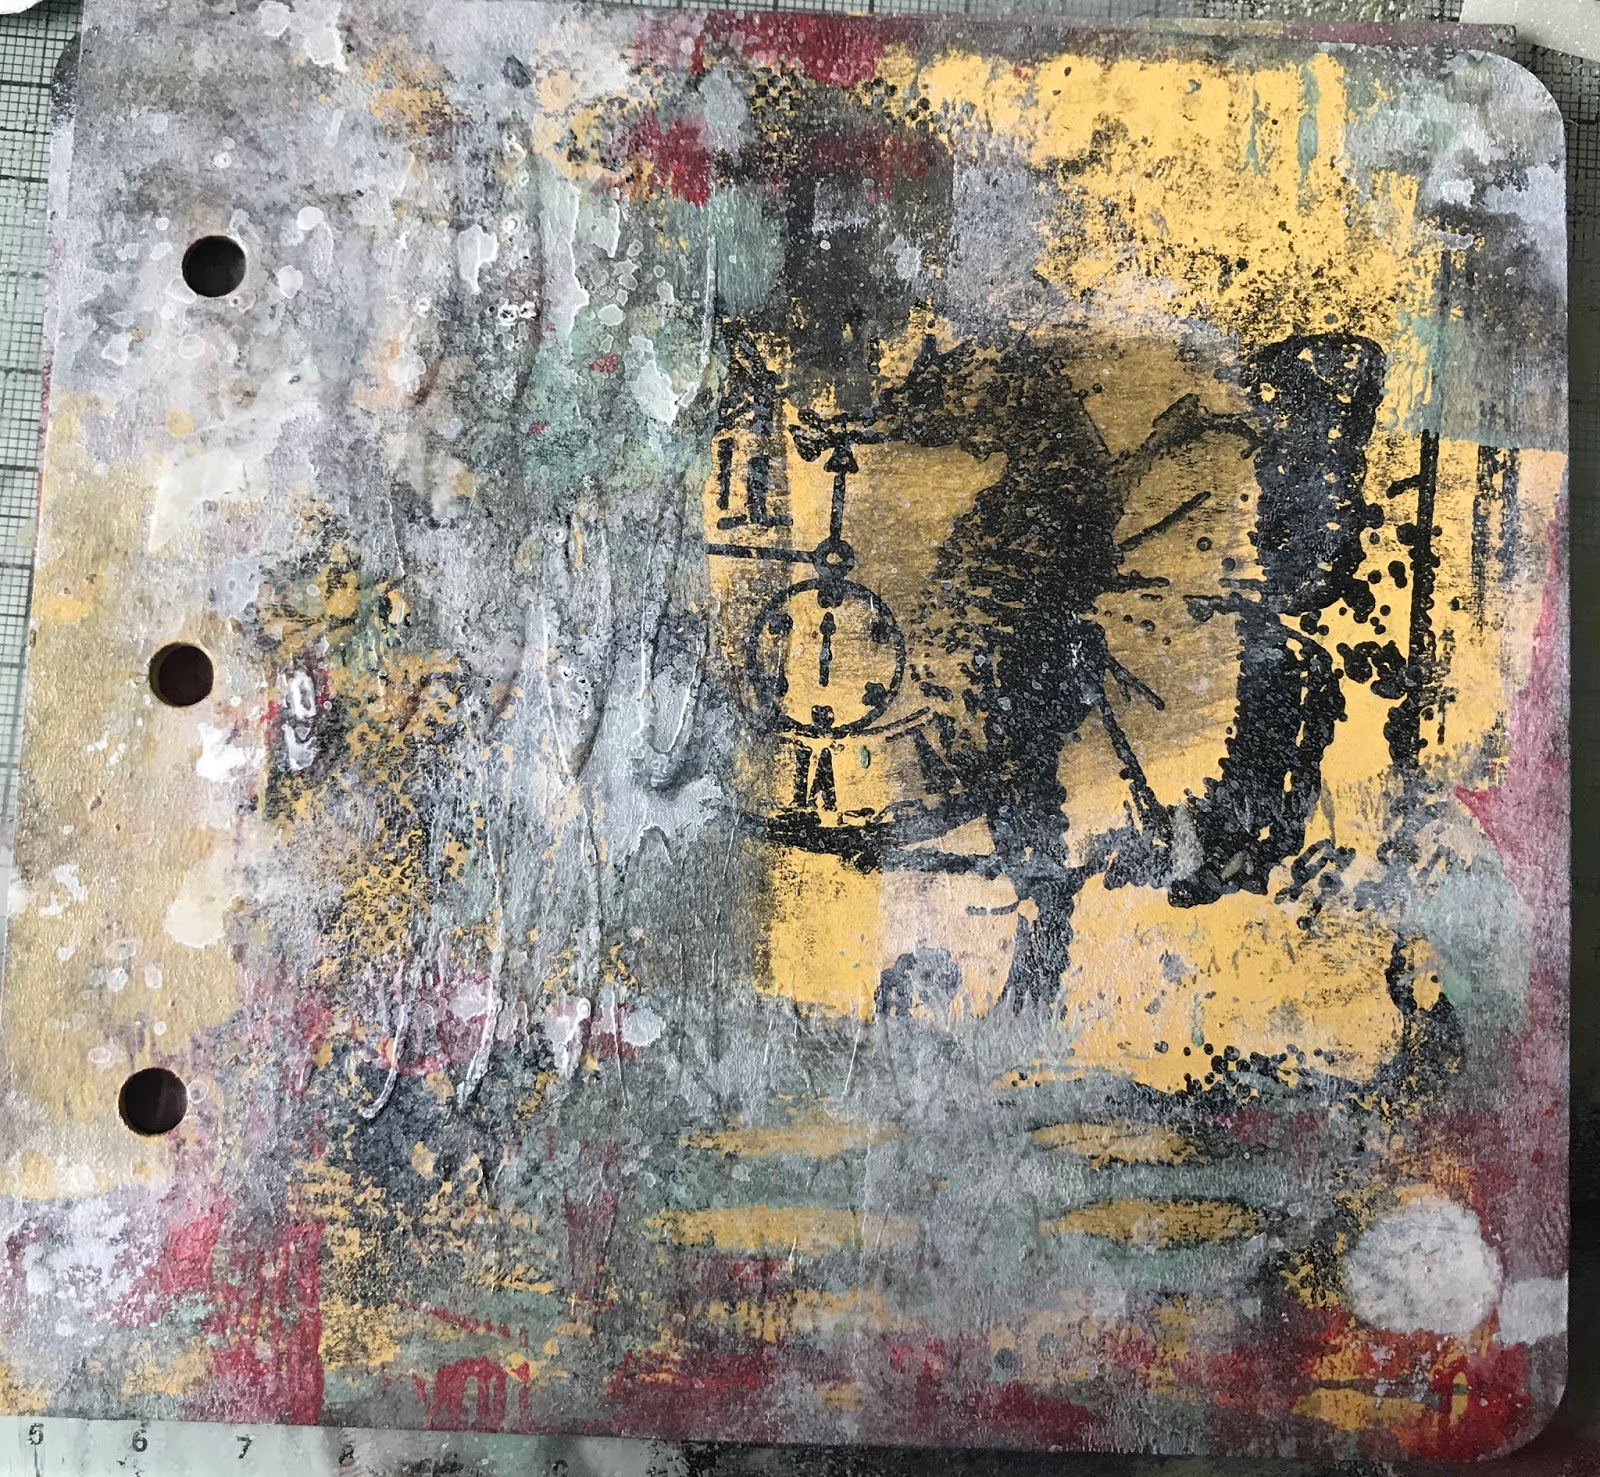
I knew I had some old acrylic paints that would compliment the colours in them so dug them out and wopped some on...
Then It kinda didn’t happen like that as my brayer, acrylic paints, gesso, babywipes, and stamps decided to take over the project!!!
So I used a selection of my Aall &create stamps and used gesso to get a lovely black crisp image on the painted surfaces... the plan was still in place at this point.
It was the brayer that led me astray!!!
Unfortunately I didn’t take pics through these stages ( or if I did they didn’t transfer over from my old phone which decided to take a swim in the loo 😳😕... that was the most expensive visit to the loo I have paid!!! Thank goodness for Icloud!!!)
What happened with the brayer was layers of various acrylic paints were brayered over the stamped images then lifted back off through Bubblyfunk stencils.
It all came out spectacularly grungey and not at all what I was really aiming for but I fell in love with the pages.
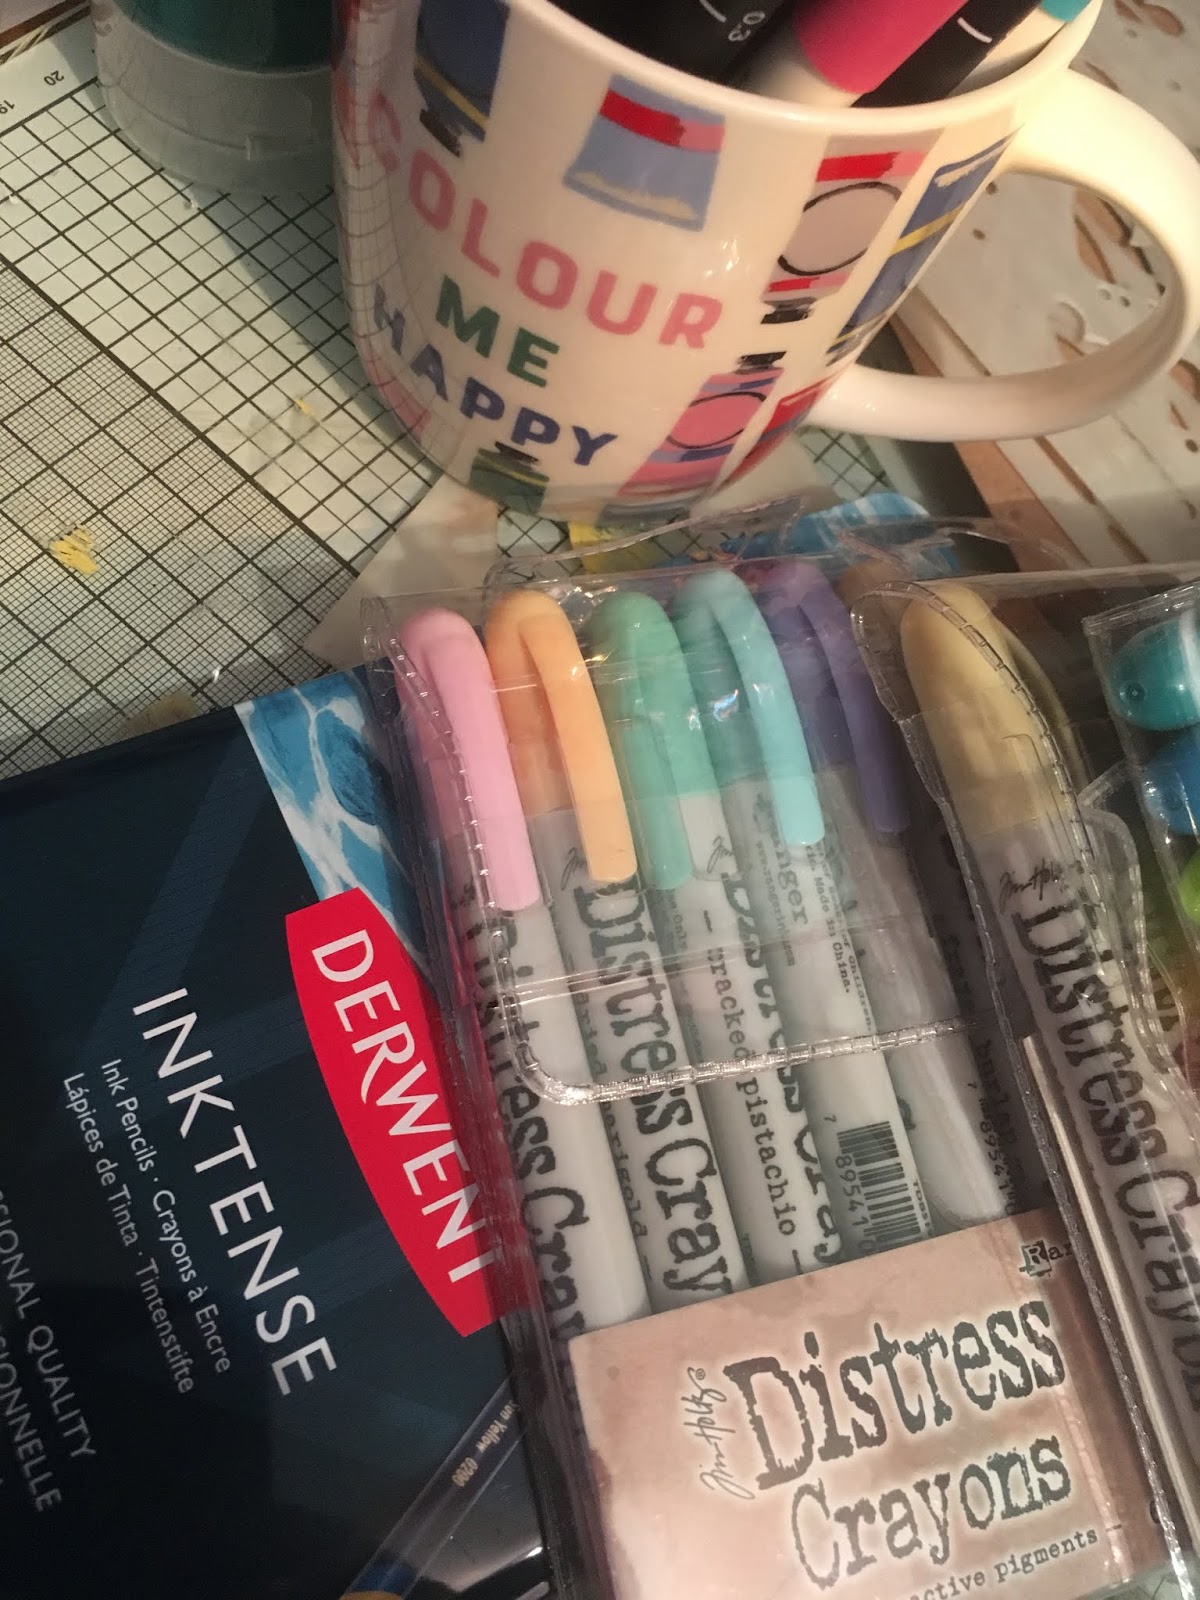
I stamped some complimentary images from my Aall & create stamps onto mixed media cardstock and roughly but lightly coloured them with my derwent inktense pencils.
If you haven’t tried these yet you really must!!! They are simply amazeballs!!
The colours are so vibrant when you add water and when dry are permanant.
I must admit I had to take a while off at this point... firstly to come to terms with the change in the project... secondly because I fell out with my black inkpad because I couldn’t get the nice crisp black images I wanted... and thirdly because we were having some work done on the house and life got in the way of crafting!
For quite a while I could’t even get in my craft room (or clutter corner as my other half likes to call it lol) and to be honest its still not tidy at all and ends up a dumping ground.
Does anybody also end up crafting in a 6” square left on the desk full of equipment or is that just me???
I have to admit my tonic glass craft mat is one of the best things I have ever bought and got it for a really good price at The Range online.
Oh and the fourth hurdle was I developed a Marvel addiction!!!! Oh my... I really don’t know how I missed these films over the last decade or so but it ended up with me having to watch all 20 movies (a few times over for a few faves - I am Groot 🤣) so that I could go and watch Avengers End game and understand it lol -wow what a movie that was... Stan Lee I salute you!!!
So at this point we will take a break and i’ll continue this epic saga in seperate posts.
So in Marvel style... This Vintage girl will return soon....
My first DT project is here now!!!
I really enjoyed creating this piece (good job because I had to do it twice because I got excited and forgot to take pics lololol)
And can I just point out how fab the packaging looks... so much more environmentally friendly than plastic bags and much easier to store them in!!
Oh, and I also read the stencil as “Love” but its meant to be I 💗u... I think it works either way to be honest lol
Have a look at the rest of the blog while you are there because there are some fabby projects by the design team on there!!
The how to...
It’s not an exact replica of the original but the nature of the techniques used are never going to give the same results. Its more about playing with the paints, inks, brayer and stencils until you find a balance and pick out the elements that you like.
So I started out by choosing a selection of acrylic paints, inks and stencils. I stencilled on to my mixed media paper with my archival ink pad as my very first layer using a sponge – don’t worry about perfect stencilling as any imperfections will be covered in the layers and you just want to be able to see the shapes under the paint.
Once happy with the result I put a little bit of each acrylic paint on my glass mat. I like to start out with the lighter colours then go in with the dark tones (Be a bit cautious with dark colours like grey because it can take over). As you can see I am currently using an old kitchen worktop protecter but use whatever you have – nonstick craft mat, glass work mat or even a smooth tile would do. Roll the brayer through the paint and the colours start to blend then apply over your stencilled images. I tend to stick to horizontal and vertical strokes but randomly applied all over. Just add as much or as little as you want until you are happy with the effect.
I decided I wanted more of the pearl colour so went back and brayered a bit more on. Keep scrap paper and cardstock to hand to clean up your brayer and any left over paint. Its amazing the results you can get from this for future creations.
I then went back in with my stencil with a darker shade of pink acrylic paint. In some places I emphasised the original images but others were just randomly placed. Next I picked out the area I liked the best, weighted down my stencil large heart stencil and applied the distress resist spray ( I sprayed too much on the second version so you can’t see the letter detail but that’s just another variation in the end result).
Make sure you wash your stencil before this drys as it will leave a coating on your stencil. Once its completely dry on your artwork you can start adding your inks. I started by picking out the heart with hickory smoke distress oxide using a sponge. Then I swiped my worn lipstick distress ink across the top then put the paper on an angle and spritzed with water letting it run over the heart shape.
When dry I took my black soot distress ink pad and swiped it a few times diagonally following the pink drippy ink, then spritzed with water again an let it run off at the angle again. I blotted up some of the ink on the paper then dried it off. You will end up with a big black puddle of distress ink at the point so have lots of scrap paper or brayered pieces to hand to mop up the ink.
Once your ink is dry buff off any excess ink on your resist heart and it will really start to stand out. I then went back to my worn lipstick distress ink and stencilled the scattered hearts and dots over the diagonal stripe ( I found pouncing the sponge left a stronger colour then swirling did – I would have used distress oxide but I don’t have a pink one yet lol).
Dry off and then add more hearts and dots with texture paste. Now go and make a cuppa and wait for this to dry or you will smudge it and ruin the texture. If you do make any mistakes or make an area too dark you can always go in with gesso or your acrylics again until you are happy with the result. I did that on my first attempt but didn’t bother the second time.
Once its dry you can then go in with a fineliner and outline the main heart and any other images you want to pop. I like the scribbly effect and its also much easier to do. Because I was too heavy handed with the resist spray the second time I repositioned my stencil and outlined with the fineliner, then went back and scribbled over.
I stencilled the word “love” in the pink distress , shifted the stencil slightly and stencilled again in my black archival to create a drop shadow. To finish I cut it down to a square keeping my favourite areas and created a scribbly edge with the fineliner. I added white highlights with my paint pen and then splattered dots by tapping my pen over another pen.
Hope this inspires you to get your paints and inks out and get messy and creative.
As you can see I have been playing about and getting covered in paint and ink lately.
Just finding my feet with new techniques and products.
Sooooo ... Imagine my surprise when Caroline at Bubblyfunk asked me to be a guest design team member for her new stencil range!!!
Of course I said yes .... hurrah... more pretty stencils to play with 😊
So the first of my projects should be on the blog here tomorrow!!!
Wanna sneaky peeky???
Go on then....
Hugs’n’snogs,
Julie xx
P.S... the Tim Holtz sizzix release is in the shop too!!!
So things have changed a lot since I last regularly blogged for me personally and in the crafting world
I have made a lovely new start in my life in a lovely new home (that has taken quite a lot of work to make it that way, and still a lot to do) 😊
But hurrah!!!!.... I have a craft room.... all my crafty things all in one place... eep... there is a lot more than I realised!!!!
To be fair it has taken a long time to collect (since teenage years... but us crafters are like that lol) a vast array of craft materials from sewing and knitting through to my current passion which is acrylic paints, inks, stencils and awesome new ranges of stamps.
My craft room is starting to take shape now and most things are unpacked, but there is still a lot to do to make it work.
So i’ve invested in quite a few amazng new things since I started my new crafting journey and a few of my fave things are my stamp platform, distress oxides and crayons, Aall & Create stamps and stencils, Jane Davenport stamps and books... i could go on lol
I thought I would do a quick share of a few projects I have completed over the last few months that i’m so happy with 😊
Although this may go horribly wrong because I can’t remember how to resize my pics lol 🤣🤣🤣
Please bare with me... I feel like a newbie again!!!
Foof...Fooooooffff....just blowing the cobwebs out of my long lost blog :D
I am creeping back in to my crafting...under the influence of JewelleryMaker.com!!!
Seriously.....what an inspirational shopping channel, that just gets better and better :D
I bought a kit last week with the red agate cala lily beads and orange, pink and blue quartz in it....they match perfectly the suedette cords I also bought there quite a while ago.
a simple design, but really striking with the lush coloured gemstones, which just happen to match one of my fave summer max dresses :D Win, win :D
Sorry I'm a bit late... but you know what I'm like LOL :D
well I come bearing news too....
I will be attending The Mad Hatters Tea Party on the 19th of April at Chill Out Community Centre - St Gregory's & St Patrick's School Esk Avenue, Mirehouse.
If you want to see what its all about visit the facebook page HERE
So guess who's going to be busy for a couple of months getting prepped?? ME lol :D
oooooo I thought had loads and loads of time but the weeks have just vanished!!!
So I set to work and have a few things ready along with existing jewellery :D
So here's a few sneaky peeks....
Scarf jewellery
Handbag hooks
and I was making hairpins but found I was collecting more for my personal use than making for the vintage fair..............but then I got a bit carried away LOL
and there's more LOL :D
Oh well, if they don't sell I will have lots of new pretties :D
is it really a wirework dragonfly???
Do you really think I got THAT good in just a few weeks??? LOL
Nooooooooooooooo - well would you believe it started as a crochet motif I bought from the auction site a while ago and it was white cotton?
Why does it look like silver wire??? Swellegant!
Christi Friesen's awesome metal paint transformed my pretty crochet piece in to an even more awesome addition to my wirework pendant!!
I added peridot chips and wire both from jewellery maker which is also a UK stockist of the swellegant products :D
I gave it all a coating of charcoal dyeoxide to tone down the brightness of the wire :D
Christi, I hope you love it too :D
I am working on a much bigger piece but just had to share this in the meantime :D
hugs'n'swellegant snogs,
Julie xx
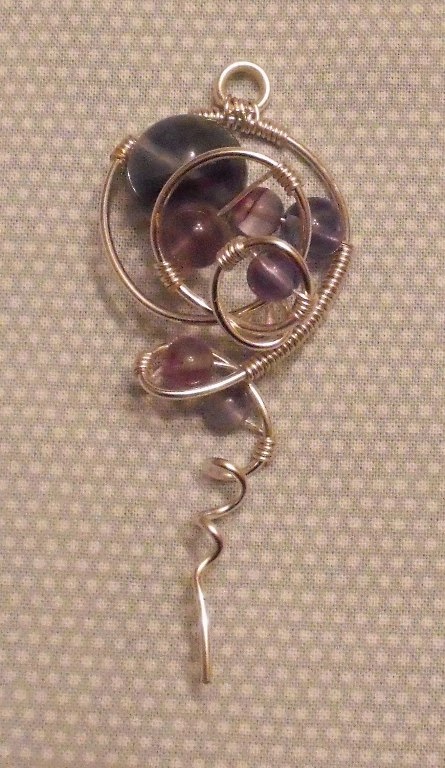
I have been playing with wire and gems again :D
The moon shaped pendant is made with gold and silver coated copper wire with moonstone and shell stars
The wrapped stone is a gorgeous piece of blue chalcedony which is cut and polished on one side but rough (but smooth LOL) and textured on the other side,
The colour running through it is gorgeous and the sparkle on the rough side is sooooo pwitty :D
It is wrapped in copper wire with moonstone chips added.
Now what to hang them on???
They are fairly large pieces so would even make pretty suncatchers
I've been a paper scrapbooker since 2004 and also like altered art and mixed media.
I have always enjoyed arts and crafts from a young age and have dabbled in most things from knitting, jewellery making, card making etc...
I've been out of the craft loop for several years but have jumped back in feet first lol...
I'm a vintage girl trapped in a modern world, so I'm just going to alter it bit by bit :D


.JPG)


