Showing posts with label Graphic 45. Show all posts

Friday, 23 August 2013

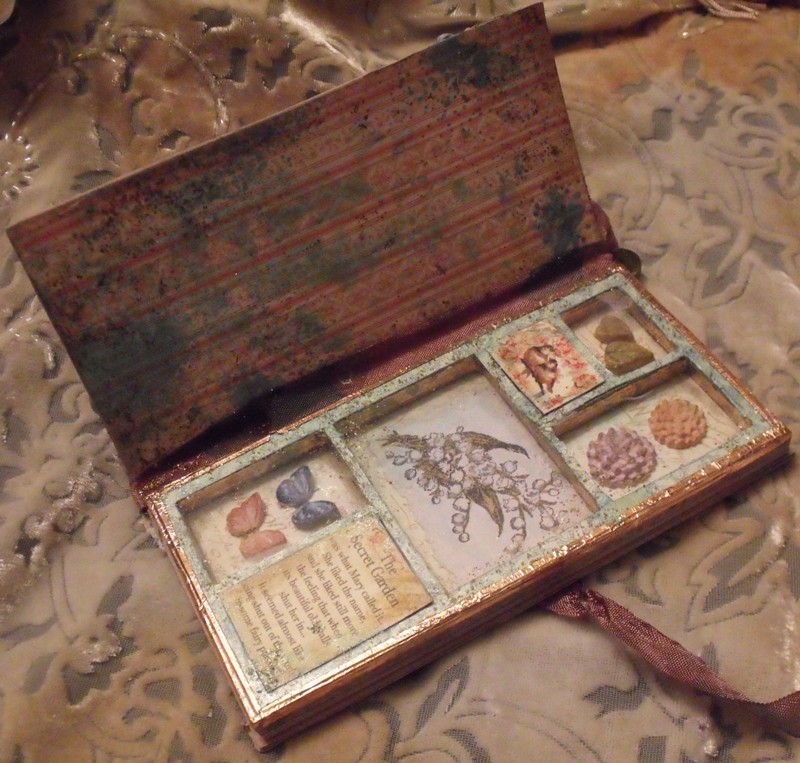
Secret Garden Specimen box for That's Crafty


What's the secret???
Open it up to find gorgeous garden finds :D
I have used Graphic 45 Secret Garden stamps and papers on a Tando covered printers tray to create this pretty vintage style specimen box.

For all the deets visit the That's Crafty blog HERE and to go shopping visit the site HERE :D

here's a close up of the inside ....


Hugs'n'snogs,
Julie xx


Saturday, 3 August 2013

How curious, Alice mobile for Thats Crafty

 That's me :D

Yes,  I am very honoured to be the guest designer for August on the That's Crafty blog :D
If you haven't been and visited the shop head on over HERE and see the amazing range of stamps and other crafting goodies in Laura's fab shop :D

This is my first piece using the lush Stampendous Alice stamps along with tando chippie yumminess :D


I had a terrible time trying to capture this at its best so will attempt to try and get some better pictures for you while I am on my weeks leave this week ;-)
For all the deets and how to visit the blog HERE and show me some support :D

I am rather out of practice at not only blogging but crafting these days!! But I intend to sort this out :D
I have some fabby Tando to play with, moulds and paper clay, and lots of yummy stamps :D

Watch this space,
hugs'n'snogs,

Julie xx

Saturday, 4 May 2013

Forget me not...

 
As soon as I saw the Graphic 45 Secret Garden I had yo have it...I'm sure it was made just for me LOL
Its just so pretty and vintage and floral (and the amazing Diane Schultz follows me on Pinterest and often repins my pins ;-) )

I reluctantly cut in to my 8x8 pad to make this project - I have to admit it was cut very carefully and sparingly to maximise its use (...my precious...LOL)

I decided to finally use the giant peg I got from Happy Daze, which I had already sprayed purple with cosmic shimmer agggggeesssss ago - it was a failed Halloween project (never throw anything away!!!)

So to start with I covered the front panels with my paper, sanded and inked the edges lightly and added lace, buttons, seam binding ribbon and distress stickles in Victorian Velvet.All the pieces were glued down with Claudine's Matte Medium.


The frame is some chipboard shapes I already had and matched the panels in the G45 paper perfectly (which was a happy accident rather than planned LOL)
I used Inka gold on all the edges then covered with the paper, sanded and lightly inked with Frayed Burlap.

I decided to make a little blackboard on one side of the frame with some self adhesive black board material I had picked up in The Works ages ago, so stuck it on a piece of plain chipboard.


I covered the other side in the patterned paper with a little bit of layering and tearing to age it, then cut out the panel from the paper pad and glued on.
I added my Forget me not message with Tiny type clear stickers and  highlighted with blobs of glossy accents.

I added some lace to the reverse of one of my frames around the edge then  glued the sandwich together with glossy accents, which dries quickly and really holds the chipboard nicely - just don't get it on your pp.

I glued on the buttons and Prima flowers but it just didn't look finished, so I made some holes with my trusty pokey tool and embroidered through the sandwiched frame.

 The cross stitch looked pants on the reverse side so I covered a chippy heart and glued over the yucky stitching ;-)


The little dangly is a scrap piece of chippy covered in paper and die cut with a sizzix jewellery die with buttons added on jump rings.

To finish it off I added more distress stickles and rock candy stickles because I just have too add sparkle (it's the inner magpie in me ;-) ).

So now I have a cute little memo Blackboard that I can write my important messages on, that looks really pretty just sat on my desk :D

Oooo it felt really good getting inky and stickled again after all this time!!
Watch this space ;-)

Hugs'n'snogs,

Julie xx


Friday, 25 January 2013

Birdie faux bell jar for Happy Daze

 
Happy New year everyone - better late than never huh :D
The theme over on the Happy Daze blog this month is recycling because I'm sure we all need to be a little bit thrifty after the season of goodwill and long pay months LOL :D

My project is something I have been wanting to do for a very long time but was struggling to find a cloche or bell jar - they have been increasingly popular since TH released his sizzix die, and impossible to find at a reasonable price! (thanks T!m LOL :D )

I found a very clever idea on Pinterest showing a pop bottle transformed in to a bell jar from THIS BLOG so thought I would give it a go.
I am a Pinterest addict by the way, so if you want to follow me or any of my boards click the button on the side bar :D

I have to say its not very easy sawing the top of the bottle off without crushing the rest of the bottle, so after a couple of attempts I enlisted my hubby's help. he found it easier to leave the top on but remove the seal ring, then hold the bottle by the top to saw. Tricky, but he managed it one attempt, and found it pretty funny that the top of a coke bottle was so precious to me LOL :D

The base was made from a ribbon spool from my Christmas wrapping, an old cd and the back of my Tim Holtz paper pad, which I covered with Graphic 45 paper, acrylic paint, and TH crackle paint in Frayed Burlap.
I then tied a piece of ripped Tilda fabric around, glued on some lace and spritzed everything randomly with a distress re-inker mist to age it all.

I painted one of these cute little wooden houses stuck on a mini wooden bobbin in acrylic paint then added paper accents to the roof and back. I stamped the black paper before I stuck it down, with my Picket Fence distress marker to give a chalkboard effect.

I inked the edges with distress ink and gave it all a spritz with the ink mist. The piece of fabric tied around the bobbin was a leftover stamped from a previous project which says May you love... so I pinned on a TH muse token which says FOR EVER MORE.

I added buttons, bling and flowers, and a mini bird nest, and a teeny bird I bought from a florist supplier on e-bay.
I spritzed again with the ink mist and added some distress stickles randomly.


For the bell jar I added a game spinner and a  time piece to a curio knob with the screw and glued them on to the cut off top of the bottle.

Then glued on some lace which also got spritzed with the ink mist. I added distress stickles to the outside of the bottle around the top and bottom and just to make the bottle look more aged I sponged on some brown alcohol inks on the inside of the bottle.
I just placed it over the birdhouse and Voila, a cute recycled project :D


Who would have thought it had started life as a pop bottle, cd, packaging and a ribbon spool???

Pop on over to the Happy Daze blog to see other fabby projects and enter this months comp while you are there - not long left to enter so get recycling quick :D

Hugs'n'snogs,
Julie xx


Thursday, 5 May 2011

Compact and beautiful


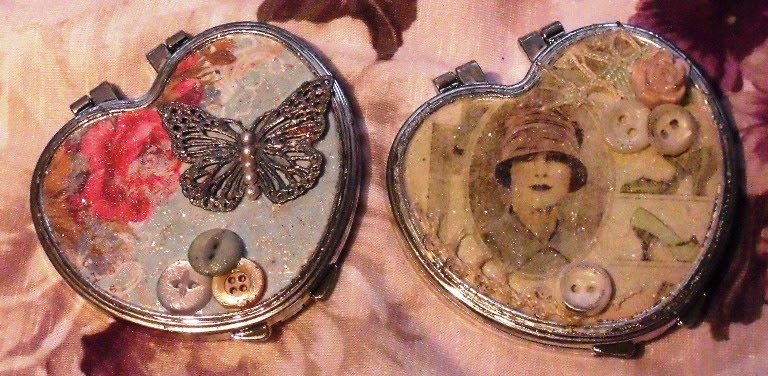
Heres another pair of compacts to share with you and I have to say I think these are my faves :D
How pretty and vintage are they :D
I used Prima and Graphic 45 papers to alter these compacts.

Want to know how to??? I have blogged these over on Bubbly Scrumptious so head on over HERE for the deets :D
While your there don't forget to take a look at the other design teams gorgeous work :D

heres a closer look for you :D


Hugs'n'snogs,
Julie xx

Saturday, 30 April 2011

Mirror, mirror in my hand........

I found some cool little compact mirrors this week so have been very busy altering them - in between walking the dogs and watching the Royal Wedding :D

Comgratulation to William and kate on their beautiful wedding and WOW at that dress!!!
I Love, Love, Loved it :DOk,back to the mirrors :D

I will have more to share with you soon hopefully as I am planning on selling these when I get round to booking my craft fair :D

Hugs'n'snogs,
Julie xx