Wednesday, 30 March 2011


My Mum loves reading so what better present to make her than a pretty bookmark :D

The metal blank was bouught at my local craft shop but can be found for not a lot of money on the internet.

To embellish it I used pieces of broken jewellery, a few charms, my signature piece - buttons :D and of course some Tim Holtz fragments.

I didn't really understand what fragments were when I first saw them on the internet but they are such a cool little piece of kit when you get playing with them and you get loads!!! :D

I used a couple of pieces from the charm set and adhered them to some double sided paper with glossy accents by coating one side of the fragment, placing on the area I wanted to feature on the paper, and wiggling a little bit to move the glossy accents until it was evenly coated.

When dry I cut around the shape and sanded the edges.

To finish them I stamped them with Prima mini stamps with archival ink in plum - these are amazing stamps for small projects as there are so many small images to choose from.

Everything was linked together with jump rings - which Tim also does - how fabby would one look with some of the baubles mixed with fragments and keys??

Or perhaps you could do a cute easter gift instead of eggs - stamped shrink plastic charms would look so cute :D

Or how about putting photos of your loved ones on the fragments to create a lovely keepsake.

Hugs'n'snogs,

Julie
Sunday, 20 March 2011

My distressing is now organised :D

Well as I mentioned on Saturday I bought the teabag box from Moira to organise my blending foam - well look how the decorated box has turned out :D


Here's how to.........

Start by painting it with white gesso, then paint it with white acrylic paint.

When dry I add on some TH tissue tape to strengthen the hinged lid and to add decoration.

Rip a piece of patterned paper - I used a piece from a book of sheet music.

Stamp background stamps randomly in acrylic paint - I used a Ranger paint dabber in pearl then colour with distress inks. When dry rub the stamped images with a very slightly damp cloth to remove the ink and reveal the image.

Next coat with a crackle medium -mine was from a local craft shop.When dry paint with a top coat of your choice.
Rub in distress ink with a piece of cut and dry foam to age the colour and highlight the cracks.
Paint on a thin coat of Claudine Hellmuths multi matte medium - the distress ink will lift but settles in the cracks of the paint.
Glue on a chipboard shape to the lid and cover with scrunched up tissue paper stuck down with the matte medium. When dry I highlighted it with distress ink.
Add on more tissue tape - I randomly added it to corners and on the back of the lid to give the impression the box had been repaired, then inked with vintage photo DI to age it.

For the top I chose a selection of random elements I have collected and started playing around with how I like them placed.

The girl is stamped on to a piece of vellum and stuck down by the objects around her and the optical lens.The piece of canvas was created with the faux batik technique I used HERE.

When you are happy with your arrangement glue the items down with the matte medium - because it dries clear it doesn't matter how messy you are - but you won't be able to ink again as it will resist.
Smear on some Distress stickles to highlight areas as much or as little as you like - I love its subtle aged shimmer.
Once I was happy with the top I started stamping around the sides and using TH distress embossing powders on some of the images to add a little bit of texture.
Again I added embellishments - mainly buttons, some mosaic pieces, a couple of tags from clothes (got to love River Islands mini masterpieces :D), lace and a scrap of the Batiked canvas I had cut off.

Then its time for the inside :D
It was already painted white and I crackled the inside of the lid at the same time as the rest of the box.
The sections were just spritzed with a combo of Cosmic Shimmer mists and edged with the tissue tape - this doesn't stick too well so needs coating with the matte medium to hold it down.

I decorated mine to house my blending foam on the cards I shared with you On Saturday but you could yours for anything you want!!
The cards I have cut are 6.5x6.5 Cm's so if its smaller than that it should fit :D

  • What about your ideaology bits and pieces?? some of those are quite hard to store in traditional boxes.
  • Or if you have a lot of small stamps you could index them - or even store them in there - the Prima minis would just and no more fit if you cut the strip of gems off and trim the bottom.
  • Or index your ideas that you just never seem to get around to trying, but then can't remember what you wanted to do when you find time??
  • Or make a memory box?
  • You could cut cards to fit and store ribbons or lace.
  • If your a scrapbooker or card maker you could print or draw design sketches you want to use at a later date.
  • They aren't quite tall enough for stickles or alcohol inks but the lid could easily be removed if you wanted open top storage.

You want one now don't you LOL :D

This was created for HAPPY DAZE and SCROLLS WORK STAMPS and nearly all of the items used are available from Moira.

Moira's next Facebook challenge is starts today and the theme is "in a Vintage style...." so hopefully this project will inspire you to dig out all those fabby embellies we all like to hoard and stick them on a project :D
Or perhaps you have some amazing stamps???
Moira stocks the fabulous Scrolls Work stamps and they have many stunning vintage images :D

It doesn't have to be a big project like this one, it can be a card or even a tag but make sure you upload to the Facebook page HERE for the chance of winning a £15 voucher :D

Hugs'n'snogs
Julie xx

Saturday, 19 March 2011

Distress blending foam organisation???

Ok, so I was getting frustrated with my foam pads chucked in a a zip lock bag, which I had to -
A. rummage through to find the piece I wanted
B. find the bag from its hiding place in the first place!!!

A thread was started over on UK scrappers a while ago and I absolutely fell in love with this idea by lebosiNifty huh???

Well I decided I had to copy it because it was such a fab idea but decided to take it a step further - being me hahaha:D

So when I got this fabby teabag box from Moira at Happy Daze the light bulb moment happened :DI cut pieces of white cardstock to fit inside the sections but smaller than necessary as I wanted to laminate them.
Distressed the edges with my tool- which in hindsight I wish I had left until after I had inked them LOL.


I inked one side completely plain but showing different depths of the ink colour.

The other side I decided to show different techniques using the blending inks so started by using the ones from Tim's book Compendium of Curiosities.
When I had finished each one I wrote on the front the name of the ink pad, the technique with page number and materials used.

I didn't want them to get all inky when they are in the storage box so wanted to laminate them -only trouble is I don't have a laminater!!!

So I found a huge roll of clear packing tape my hubby had brought home and encased them in that - using an old giftcard to burnish it thoroughly :D
I cut away the excess tape then stuck on a piece of hook velcro to hold the foam pad.

The stamps are both Scrolls Work - #2551 sequin waste and #2543 leafy flourish.


Its a Genius idea isn't it, so huge thanks to lebosi - aka Isobel, for the inspiration :D

I am mid way through the storage box so don't forget to come back and see how it turns out :D

Hugs'n'inky snogs,
Julie xx

Friday, 18 March 2011

Ollie's first walkies :D

Well guess who we went to visit today???
Yup.............Ollie :D

How cute is my wee man :D

"I can't say cheese I'm only a pup!!"


"Hmmm looks interesting but tastes YUK!"

"Is it time to go home now???"

Hugs'n'snogs,
Julie xx

Thursday, 17 March 2011

Ollie LO :D

Evening everyone :D

I have another LO for you this week of my gorgeous Pupster who is now named Ollie :D

I bought him and Rolo tags with their names on this week ready for him coming to live with us, which inspired this weeks layout :D

I started by printing the photo on to canvas paper - downside to this is it doesn't photograph well as it has a glossy surface.

I ripped a hole in the Cosmo Cricket paper and used a distress tool around the edges of the frame and around the outside edge of the paper.

Next I used Crushed Olive and Wild Honey distress inkpads and covered the whole paper Tim-style blending the colours together as I went.

I then spritzed with Cosmic Shimmer mist and diluted Spiced Marmalade re-inker.

I tore random holes in the paper and distressed these too and backed with a cute paper which looks like balls bouncing (Rolo is obsessed with balls do Ollie won't get much of a look in with any I don't think LOL).

Ollie 4 by Julie Dandy

Inspired by the paper I used a circle of chipboard, painted it a deep red and added the stripe to look like the balls on the paper. I also took a smaller circle, punched a hole and covered with silver inka gold. when dry and buffed I wrote his name and the date with a fine tip pen - because its a hard nib it looks like an etched tag :D (I planned it really LOL)

Ollie 3 by Julie Dandy

I used the cut off strip from the paper and an embellie from a co-ordinating strip and layered them up in the corner.

I then randomly stamped it with a Scrolls Work stamp #2547 mesh, and Olive archival ink.

It turned out quite a cheap and cheerful layout not using any proper embellies but I love its grungey simplicity:D


Hugs'n'snogs.

Julie xx

Sunday, 13 March 2011

Introducing Ollie :D

...........our cutie patootie pupster :D

He is a show cocker spaniel and is about 9 weeks old, and we collect him in 4 weeks time :D

Watching him run around with his mum and sister yesterday I think we might be in for some fun for a while with him and Rolo LOL :D

I can't wait :D

Hugs'n'sniffy puppy snogs,
Julie xx

Saturday, 12 March 2011

Got to share this link......

I know we all love our crafts and hobbies but do our other halves enjoy them and appreciate our genius???

I'm not sure about that but I could never get my hubby to do this and let me put it on the net!!!

Go and check out the poor other sad victims of etsy crafters HERE and feel their pain LOL :D

Awwww man..........too cruel peeps LOL

Hugs'n'chuckling snogs,
J xx


Steampunk genius............

.....using Scrolls Work stamps :D
Well it was time for something a little bit different and here it is :D
I bought some fabby blank russian doll money boxes at a local bargain shop and decided to steampunk this one up :D

I think he is way cool :DI painted the money box with acrylic paint then spritzed with cosmic shimmer.
I stamped the cog images on to masking tape and inked with distress inks.
When dry I tore sections and randonly applied them to the money box.

The larger images were stamped on to fibre paper then glued on with glossy accents.
I layered up the images until I was happy with it and highlighted areas with a gold pen.
I used Glossy accents to create raised glass like highlights to parts of the images
I stamped the light bulbs on to white shrink plastic remembering to punch a hole before shrinking. I then threaded them on to some brown wire and twisted until I made a thought cloud.

I attached it by threading it through the coin slot and taking it out through the hole in the bottom several times.
I added chains with glossy accents and joined it up with the wire
I think he is soooo fun :D

I used the followng stamps, most of which are available from Happy Daze in the uk.

#9013 Goggles
#4079 Jules Verne
#9109 Dictaphone
#9100 Sprocket
#9102 Cog
#9101 Gear
#9104 Guage
#9105 lightbulb
#4077 George

Most of these are also available on a plate direct from Scrolls Work HERE

And as a little bonus you can save 15% until 12/3/11 :D


I forgot to share these with you last week!!!
I bought some resin to play with and already had some cake decorating silicone moulds - you did see the little wren on my shades of blue project for Moiras bi-weekly Facebook challenge HERE but this is how they started :D


and home made facets :D although if I had thought I wouldn't have bought this mould, I would have made my own with mould and pour and the many gems I already have LOL.......oh well - I might have different shapes I can play with :D


Thats it for now - I'm hopefully going to see the pup with no name later so will share pics with you when I can :D

Hugs'n'squishy snogs,
Julie xx

Thursday, 10 March 2011

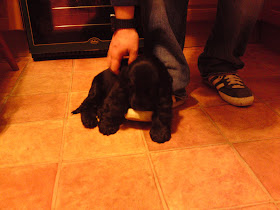
Well what a cutie patootie surprise my hubby gave me this week :D

We have been looking for a little cocker spaniel to keep Rolo company for a while with no luck.............then my hubby, on the pretence my Mum wanted to see me, took me to see this little sweetie :D

07032011190

Apologies for the quality of the pics, but its very hard to capture anything good on a phone camera of a squiggly jiggly 8 week old black puppy LOL :D

Well for the LO I used Cosmo Crickwt through out.

I distressed the edges of the largest piece of paper and inked with TH wild honey ink pad.

I then used a TH mask and spritzed with a combo of cosmic shimmer mist and diluted distress ink in a mini mister.

I tore a piece of paper from the same range and inked with Crushed olive distress ink pad, stuck to the base and added my photo.

I then used the negative part of the mask over the photo and spritzed again.

025

I gave it a blast with my heatgun to dry the inks off, then folded back the bottom corner, stapled and added a piece of contrasting paper behind to re-form the corner of the LO.

I used TH alpha masks to create the title and randomly outlined with a fine tip black marker pen.

022

The question mark was hand cut from the patterned paper and stuck on with foam pads to create some layered depth.

024

I thought it would be fun to add the names that had been suggested or we were considering because of the fun we are having trying to decide.

023

That's the fun part of scrapbooking - preserving the memories of things you will undoubtedly forget :D

So what is my new furbaby's name???

I really love Ollie, but having trouble convincing the other half LOL

Lastly I have to share this pic with you because my other furbaby, Rolo, was just too funny on the way home this afternoon :D

10032011192


Hugs'ncutie snogs,

Julie xx

Tuesday, 8 March 2011

Did you know Happy Daze has a Facebook page? We have been busy making it a fun place to visit and it has these great features:

  • Fortnightly Challenge - Every two weeks we will set a theme for our wonderful customers to upload a piece of work made on that theme using one or more products stocked in the shop. At the end of the month we will select one entry at random - love that word - at random, to win a £15 Voucher to spend in the shop. The first theme is "Shades of Blue" and the closing date is midnight on Sunday 19th March. Make anything you like and load it to the Wall, we will copy it to the right album for you.
  • We really do want to see lots of work by our customers so please share any artwork you create using Happy daze products. Just post directly onto the wall and we'll move it to the appropriate folder. Its lovely to see what our customers have created.
  • Discussion - a forum style section for anyone to start a discussion on crafting related subjects - techniques, Happy Daze products, queries, gossip whatever
  • Swaps - anyone can call a swap, just start a new thread in the discussion forum, whoever calls the swap manages the swap.
  • Stock updates - we'll pop info on the Facebook about new stock and stock updates so you can stay up to date with new lines.
  • Photos - we will be uploading work by the Design team
  • Blog posts automatically load to our Facebook page

Do pop along and "like" HAPPY DAZE and then you will see all the updates


Moira has some fabby new lines in stock already and more are appearing rapidly.

Hugs'n'snogs

Look whos coming to live with us.....

:D
Omg what a cutie patootie my hubby surprised me with this evening :D

In 5 weeks time this gorgeous little furbaby will be mine, all mine :D unless he is naughty then he will be all Pauls LOL

So I need help??
Whats his name?
I like proper names and am considering Barney at the mo............hubby likes Jasper .................what do you guys think??

Hugs'n'snuggly snogs,
Julie xx

Edited to add - he's a show cocker spaniel :D

Sunday, 6 March 2011

I guess that's why they call it the blues...........

Moira has started a bi-weekly challenge over on the Happy Daze FACEBOOK PAGE and the first theme is called Shades of Blue.

This is my interpretation using Memory glass and my new resin embellies :D
How cute is my little birdie and the feather???
I bought the cake decorating moulds from ebay but its also fun to make your own with Ranger pour and mould :D

I started by stamping a Prima mini stamp in versamark on to frosted memory glass and embossed with detail clear embossing powder.
I the coloured a piece of clear memory glass with a selection of blue alcohol inks dabbed on randomly.

I stamped a piece of card with Birds of a Feather by Artistic Outpost in black ink, then coloured with vintage photo distress ink around the edges.

I sandwiched it all together and sealed it with aluminium memory foil.

My resin shapes were coloured with the alcohol inks and glued in with glossy accents and highlighted with inka gold in Cobalt blue., which I then applied with a brush to the memory foil.

I finished off with a few splodges of Distress stickles in faded jeans.

So as Elton says ......I guess that's why they call it the blues ............
:D

Hugs'n'snogs,
Julie

Configure your sewing room...........

I finally got my first project with T!ms configurations completed :D

I bought THIS ONE from Moira and believe it or not this is just 4 of the little boxes from it glued together with ULTIMATE GLUE and a piece of scrap chipboard stuck on the back to even out the surface :D.

The whole box is covered in vintage pattern pieces glued on with GLOSSY ACCENTS and the left over pieces were stuck in to the inside of the boxes :D

I used DISTRESS INKS in Victorian Velvet and Broken china sponged on all over.
The little spools are HERE and are also glued on with the the ultimate glue.
I would thread round them and coated them with Claudines MATTE MEDIUM to seal them in place.

The fabric pieces are Claudines STICKY BACKED CANVAS and I used the batik technique described HERE to create the panel stamped with Tims stamp.I stamped Paperbag studios STITCHED AND TIED randomly all over the box including the front edges.

I added all of my little bits and pieces that I had collected together and glued them down with the matte medium - its fabby for sticking down embellies because you can't see it if you are messy like me when it dries :DI actually bought a gorgeous pin cushion to go in but it was too big unfortunately, so I made my own by sewing round the edge of a circle of fabric gathering it up and stuffing with cotton wool. Then with my huge needle I segmented it with stitches around the outside to create that pumpkiness effect :D

It looked a bit clean for me LOL so I gave it a spritz all over with COSMIC SHIMMER MIST in Twilight black to grunge it up a little bit and add a gorgeous sparkle :D

I really can't wait to get stuck in to the main box but I'm still collecting bits to go in it :D

Hugs'n' snogs,
Julie xx

Friday, 4 March 2011

look out altering peeps.............

there are some amazing new items that have just arrived at HAPPY DAZE ready for you to make your mark on!!!

I NEED this!!!!


I'm so excited to see these in stock after helping Moira choose them at Stitches :D

Now then, please don't order everything before I get there!!!!

Hugs'n'snogs,
Julie xx