Sunday, 12 May 2013

Beadsmith Macrame board.... new toy review!!!


Ok, you might think  "I would never use this - I don't make jewellery..."
BUT if you want to do any type of weaving work I highly recommend this item.
Its made from a really sturdy memory foam with notches all round the edges.
It might seem a very basic tool, but its perfect for the job it does!!!

I tried to do the pearl bead weaving I have on my board on a small bead loom, it was incredibly difficult and nowhere near as neat as it has turned out on the macrame board.

I also made this bracelet from lace and fabric scraps on my beadloom - it would have been sooooo much easier on this board, believe me!!!
Bead weaving is really easy and could be used with some awesome items in your mixed media work, nice fibres, beads, buttons, lace, fabric scraps spring to mind for me...and they don't have to be uniform!!

I wanted to make a thick choker necklace with my pearls and was quite disappointed with how it turned out, so when my macrame board came I took it apart and have remade it - quick and easy!!

To bead weave you start with an extra downward thread (lazy thread) to the amount of beads you are using - I have used 5 beads wide, so have 6 lazy threads.
To make the beading easier I put my bobbin from my original bead loom under the threads near the bottom so that the beads had room to move under my lazy threads. You could use anything really, even a marker pen - just something to lift them from the board.

I attached my beading thread to the outer lazy thread and passed my needle underneath all of the lazy threads. I then threaded my 5 beads on, and spaced them in between the lazy threads.


I took my beading thread around the outer lazy thread, then passed the needle back through the beads over the top of the lazy threads.

Then repeat the whole weaving process.

I love the board because of the notches, you can take all your excess threads and secure them on the sides, and even keep your thread secure if you need to leave your work.

Because it is memory form you can safely stick pins in to it, or your needles.  

I got mine from the Jewellery Maker shopping channel but I'm sure you will be able to pick them up in beading shops too.

My beading is nice and straight because I have used beads all the same size but can you imagine the texture you can create with random items and threads - paper beads, shells, bakers twine....
Hope this is helpful to you all,
Let your imagination run riot!!!

Hugs'n'snogs,

Julie xx

edited to add... This is not difficult at all - incredibly easy, and incredibly quick if you use large beads like I did :D

Sunday, 5 May 2013

Sew cool :D


I spotted this On GillyB's blog and had to snaffle it for mine too :D
Isn't she fabby :D

J xx

Saturday, 4 May 2013

Forget me not...

 
As soon as I saw the Graphic 45 Secret Garden I had yo have it...I'm sure it was made just for me LOL
Its just so pretty and vintage and floral (and the amazing Diane Schultz follows me on Pinterest and often repins my pins ;-) )

I reluctantly cut in to my 8x8 pad to make this project - I have to admit it was cut very carefully and sparingly to maximise its use (...my precious...LOL)

I decided to finally use the giant peg I got from Happy Daze, which I had already sprayed purple with cosmic shimmer agggggeesssss ago - it was a failed Halloween project (never throw anything away!!!)

So to start with I covered the front panels with my paper, sanded and inked the edges lightly and added lace, buttons, seam binding ribbon and distress stickles in Victorian Velvet.All the pieces were glued down with Claudine's Matte Medium.


The frame is some chipboard shapes I already had and matched the panels in the G45 paper perfectly (which was a happy accident rather than planned LOL)
I used Inka gold on all the edges then covered with the paper, sanded and lightly inked with Frayed Burlap.

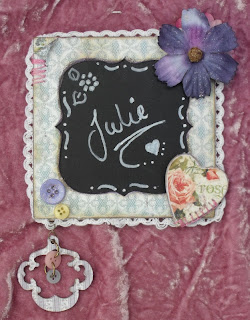
I decided to make a little blackboard on one side of the frame with some self adhesive black board material I had picked up in The Works ages ago, so stuck it on a piece of plain chipboard.


I covered the other side in the patterned paper with a little bit of layering and tearing to age it, then cut out the panel from the paper pad and glued on.
I added my Forget me not message with Tiny type clear stickers and  highlighted with blobs of glossy accents.

I added some lace to the reverse of one of my frames around the edge then  glued the sandwich together with glossy accents, which dries quickly and really holds the chipboard nicely - just don't get it on your pp.

I glued on the buttons and Prima flowers but it just didn't look finished, so I made some holes with my trusty pokey tool and embroidered through the sandwiched frame.

 The cross stitch looked pants on the reverse side so I covered a chippy heart and glued over the yucky stitching ;-)


The little dangly is a scrap piece of chippy covered in paper and die cut with a sizzix jewellery die with buttons added on jump rings.

To finish it off I added more distress stickles and rock candy stickles because I just have too add sparkle (it's the inner magpie in me ;-) ).

So now I have a cute little memo Blackboard that I can write my important messages on, that looks really pretty just sat on my desk :D

Oooo it felt really good getting inky and stickled again after all this time!!
Watch this space ;-)

Hugs'n'snogs,

Julie xx